Setting Up Your Vault
Let’s Begin
This post is about installing Obsidian.md and initializing your "Vault," i.e., a Folder. Yup, a simple plain folder stored on your computer. But let's not get sidetracked. First, I will assume you have general computer knowledge if you are reading this. My explanations will be based on Apple Computer operations as I use a MacBook Pro. Some operations may not work in the same manner as a PC, particularly Hotkeys. A subject for another day. Okay, time to install Obsidian.md.
Go to Obsidian.md and download the program (Fig. 1). It should prompt you to download a .dmg file (this is a file that MacOS uses). Once downloaded, double-click on the .dmg file in your downloads folder; voila, a window with two images (the program and application folder) should appear (Fig. 2.). Click and drag the Obsidian.md file into your applications folder and follow the installation instructions. Once completed, it is time to create your Vault.
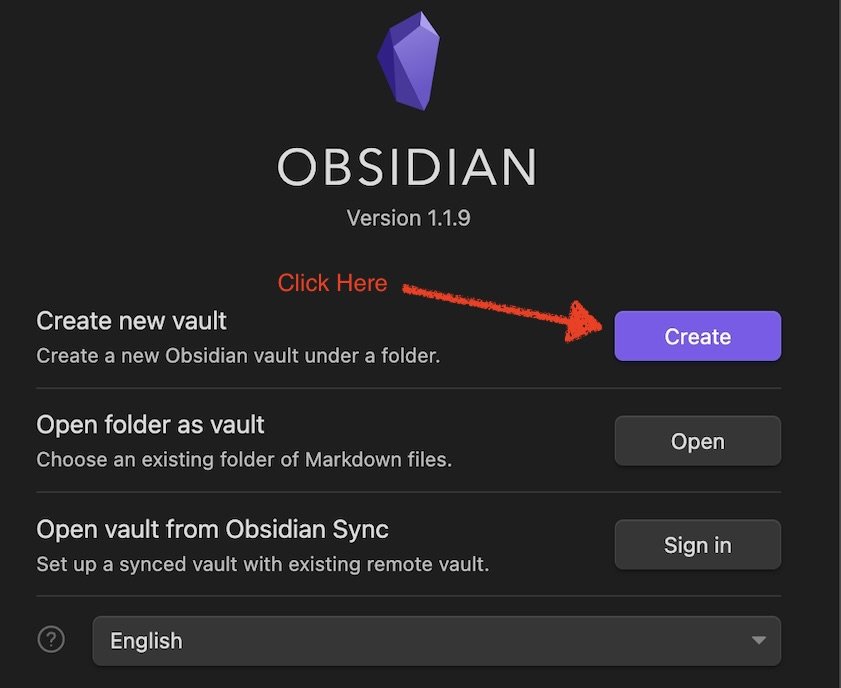
When you open Obsidian for the first time, a window will open with three choices (Fig. 3). Click the Create button in the Create New Vault row, or if you already have a folder with existing markdown files and want to use that folder, then click on the Open button. Either name or rename the selected folder you wish to use (Fig. 4). Once you have confirmed the Vault/folder name, click Create, and your vault should open up (Fig. 5). The vault's theme automatically defaults to the “Default” theme. We will go over how to choose themes in the next post.